chocolate desserts recipes | Healthy chocolate recipes | Raspberry angel cakes

Wednesday, December 31, 2014

KAREN’S CHRISTMAS PUNCH


This is a truly lovely drink, perfect for when you feel just a little bit chilly or in need of a comforting hug. And what’s more, the ingredients are super-simple and super-cheap – hurrah!
SERVES: 2-3 makes about 1 pint of punch
EQUIPMENT
Juicer, Blender
56D_Recipe_Karen's_Christmas_PunchINGREDIENTS
3 apples
4 oranges
½ lemon
Cinnamon (to taste)
Five spice (to taste)
Slices of lemon and orange for decoration
DIRECTIONS
  1. Juice the apples, oranges and lemon (including lemon peel) and pour into a blender jug.
  2. Add in the cinnamon and five spice to the jug and blend until spices are thoroughly mixed into the juice.
  3. When fully blended, pour into pretty glasses and serve with fruit pieces floating on top.
Raw Coach Top Tips:
  • If you’d like to, you can gently heat this drink in a pan on a very low temperature. It won’t necessarily make it taste any better, but if you’re used to hot drinks or love them, then this will really perk you up!

Thursday, March 7, 2013

FoodBlogs

Here are the latest headlines on FoodBlogs.com. To see all the headlines, click here

FunBites International Giveaway!
I'll away from Mar 9 on a trip to review couple of hotels in Penang. While I'm enjoying myself with my family there, I've arranged a Giveaway for you during my absence, & it's Open to All Worldwide! Read more »
Luxury Haven - 03/07/2013 10:23 AM

Reflections: (Not So) Picture-Perfect
Reflections: (Not So) Picture-Perfect I don’t know what’s worse. Having too much time on your hands and being bored out of your gourd or not having enough hours in the day to catch up on all the stuff you’ve got … Continue reading →The post Reflections: (Not So) Picture-Perfect appeared first on Picture-Perfect Meals.
Picture-Perfect Meals - 03/07/2013 10:22 AM

How to make Bell Peppers (Capsicum) digestible to everybody
Maybe not everybody knows that bell peppers, also known as sweet peppers or capsicum, are not very digestible, so even if they’re really good, contain high quantities of vitamin C and add great taste to dishes they can mess you … Continue reading → Related posts: How to make garlic more digestible and cure bad breath How to prevent sliced bananas from browning Too salty? here’s the tip to fix it!
Ilaria's Perfect Recipes - 03/07/2013 10:13 AM

Gadgets: Excalibur Dehydrator
I never thought I needed a dehydrator. I mean, I can buy prunes ... um, I mean dried plums, at the grocery store. Dehydrators are large. They're not something you'd keep on your counter all the time, and unless you have huge cabinets, storage might not be convenient. So why are they so popular? I know a lot of people who have dehydrators. Some of them don't have food processors. My first foray into doing any sort of food dehydrating was with the stove I got a few years back that has a
Cookistry - 03/07/2013 10:00 AM

Cleanse Day 4: Wonder Soup
Cleanse Day Four: Today you will eat as many as eight bananas and drink three glasses of milk. This will be combined with the special...The post Cleanse Day 4: Wonder Soup appeared first on 2 Broke Cooks.
2 Broke Cooks - 03/07/2013 10:00 AM

Wilton Two-Tone Cupcake Inserts
When you think of a two-tone cupcake, you probably picture a marble cupcake where two different colors or flavors of batter are swirled together. Wilton’s new Two-Tone Cupcake Inserts allow you to make a cupcake where just the center is a completely different flavor from the outside. The advantage to a two-tone cupcake like this [...]
Baking Bites - 03/07/2013 09:59 AM

Chocolate Stout Beer
I have nothing against cakes, tarts, pies, or delightful frozen treats. But sometimes, okay maybe more often than not, I simply want to drink my dessert. And I’m not talking about milkshakes or hot chocolate, although I do love those things too. I’m talking about beer: rich, creamy, chocolate, milk stout brewed with cocoa powder [...]©2013 Love and Olive Oil
Love and Olive Oil - 03/07/2013 09:30 AM

Meyer Lemon Risotto Recipe
It's this time of the year when my husband Lulu brings me lots and lots of citrus from our garden. I'm always most excited about the lemons from our Meyer lemon tree. If you go to the market, you'll noticed how expensive this variety of lemon is. It was such a treat when Lulu came inside a couple of days ago with about 50 Meyer lemons. It’s a small dwarf tree and hasn’t produced nearly as much in the past, but boy did it make up for it! In honor of our bounty, I have a few recipes I
Pham Fatale - 03/07/2013 09:17 AM

Irish Brown Bread - Irish Soda Bread

Delightful Repast - 03/07/2013 09:15 AM

WELCOME!
Welcome to the San Francisco Bay Area. Welcome to My Bay Kitchen! Growing up in Baguio City, Philippines, I learned most of my cooking from my late mother,  just watching her in the kitchen.  She had no recipe books or cheat sheets, just the skills and knowledge  gained from my grandmother and great grandmother. I […]
My Bay Kitchen - 03/07/2013 09:14 AM

Vanilla Cider Pork with Pears
 Well, March certainly has roared in like a lion this year.  Blizzards, thunderstorms, tornadoes….ugh.  I’m so ready to put wintery food behind me for the year, but when it continues to be wet and blustery, I just want warm and … Continue reading →The post Vanilla Cider Pork with Pears appeared first on Chew Nibble Nosh.
Chew Nibble Nosh - 03/07/2013 09:03 AM

Nifty Blogging Tips: Blog Planners and Calendars
Hello friends! I’m back with more tips! This one might be self-explanatory but I’ve found blog planners and editorial calendars to be indispensable tools now that I blog 5x a week. With only posting twice a week before 2013, I never really worried about baking by a certain time or having a post ready to … Read more
On Sugar Mountain - 03/07/2013 09:01 AM

Is Food Affecting Your Creativity?
Last year, I did a 10-day juice cleanse. It was a crazy awesome yet mildly insane experience. At the end of the cleanse, I had firmly decided that food and creativity were deeply linked. In fact, at the time, I thought for sure I was going to write a book on eating for creativity. Maybe [...]
Healthy Crush - 03/07/2013 09:00 AM

Shrimp with Spicy Garlic Sauce
I'm having one of those weeks in the kitchen where absolutely nothing seems to go right. There haven't been a ton of outright failures, just a bunch of so-so, definitely not worthy of a repeat type recipes. Dinner has been especially brutal. Three nights in a row I've tried a new recipe and I can pretty much guarantee you won't be seeing a single one of them here on the blog. I was so positive last night's meal was going to turn things around - it looked so promising when it emerged from
Tracey's Culinary Adventures - 03/07/2013 08:54 AM

Mediterranean Diet 101: Chorizo and Cannellini Stew adapted from Bon Appetit
         The Mediterranean Diet is back in the news with some startling test results.  If you switch to a diet rich in olive oil, nuts, beans, fish, fruits and vegetables and drink wine with meals, the diet will prevent about 30 percent of heart attacks, strokes and death from heart disease.  The European doctors who conducted the study ended it earlier than expected. They thought it was
Chewing the Fat - 03/07/2013 08:53 AM

Hi… My name is Kale!!!
[[ This is a content summary only. Visit my website for full links, other content, and more! ]]
KarmaFree Cooking - 03/07/2013 08:29 AM

Kale Chips
So much food, so little time, lol. Just kidding, I think.I've been wanting to try these for awhile now. Kale Chips that is, and when I found myself with a gracious abundance the other day I decided I had to make some.  Not only had I bought a little bunch of Kale last week, a friend brought me another bunch the other day and I decided it was time. I wanted to make some GrønlangkÃ¥l, with the smaller bunch, for some reason I've been craving dark leafy veggies, but with the other bunch, KAL
Sid's Sea Palm Cooking - 03/07/2013 08:25 AM

Pork Carnitas {Slow Cooker}
Today, I have a yummy pork recipe for you all that you make in the slow cooker. This meat was fabulous in tacos, but would also be great for enchiladas, quesadillas, or burritos!  Any way you serve this up will definitely make your family happy. It has that nice balance of spice and sweetness that I LOVE! [...]
Real Mom Kitchen - 03/07/2013 08:15 AM

Rick’s Steak & Bacon Tournados
My daughter just came home from her freshman year in college. This was her first meal request. I guess that speaks volumes. I did it with the asparagus and mashed potatoes. This is typically a summer deal and done on the grill but its 27 degrees and blustery here so the broiler worked just fine. Continue Reading
My Mother's Daughter - 03/07/2013 08:11 AM

Bacon, Onion, and Cheddar Corn Muffins
You guys, we leave for Japan in 6 days!!!  We are all so excited, and ready to be there.  There is so much to do to get ready for any trip, but this trip seems like double the amount of … Continue reading →
Dinners, Dishes and Desserts - 03/07/2013 08:00 AM

Go Ahead Honey, It’s Gluten-Free: Comfort Foods Round-Up
Are you ready for some tasty comfort foods? Of course you are – everyone is always up for comfort foods, right? This month’s theme for Go Ahead Honey, It’s Gluten-Free was Comfort Foods. We had a small but mighty group of participants that definitely brought some comfort to our meals. I’m definitely going to try [...]
Tasty Eats At Home - 03/07/2013 08:00 AM

Calzone di cipolla alla pugliese (Puglian Onion Pie)
This dish brings back some of my fondest childhood food memories. Calzone di cipolla, or onion pie, is one of the signature dishes of the cuisine of Puglia. My grandfather Lorenzo hailed from a small town outside of Bari, the capital of Puglia, called Grumo Appula. His sister, whom we called Zia Angelina (not to [...]
Memorie di Angelina - 03/07/2013 08:00 AM

Cocoa brownies with brown butter and pecans

Technicolor Kitchen - 03/07/2013 07:58 AM

Coconut Cream Cheese Filled Brownie Bundt Cake
You’ll love this because it’s chocolately, coconutty, and you get to take the help from a box mix!!! If you want to make a homemade brownie mix, go for it. I had an amazing coupon and the mix was already on sale, making it about 75 cents!  I saw this recipe on the Internet machine … Continue reading →
Domesticated Academic - 03/07/2013 07:56 AM

MoRoCo Chocolat Truffles
A collection of truffles from Toronto. Continue reading → The post MoRoCo Chocolat Truffles appeared first on Chocablog.
chocablog - 03/07/2013 07:55 AM

Cabbages & Fennel Salad + Calabrese Frito: Preserved Lemon Dressing
At last the unveiling! I present to you the preserved lemons I put up this past summer. They've been patiently marinating in the back of my fridge all these months. They've been shoved back and forth, used to prop up other things, been in the way, and sometimes completely forgotten- but now here they are- front and center! Last week, while walking the streets of the city, I was sure I
A Stack of Dishes - 03/07/2013 07:33 AM

Simple Cast Iron Southern Cornbread Recipe
Six tips for perfect Southern Cornbread, made in a hot-hot-hot cast iron skillet. The tips are in my latest "Kitchen Lesson" column – a series of occasional recipes with extra insider tips and ideas gained from long experience in the kitchen. Now truth be told, I'm a Yankee but when it comes to cornbread, this is my go-to recipe. The recipe starts with a big batch for a large cast iron skillet
Kitchen Parade - 03/07/2013 07:30 AM

Fire-Roasted Tomato & Spicy Italian Sausage Pasta Bake
  I love a meal where I can use up leftovers. Transform them into something new. That is exactly what this recipe is today. Back in January, I shared how to make Spicy Italian Sausage Subs with Fire-Roasted Tomato Sauce in the Slow Cooker. Super simple meal that allows your slow cooker to do all the [...]
Katie's Cucina - 03/07/2013 07:00 AM

Gluten-free Baked Lemon Doughnuts
  If you live somewhere that has snow on the ground for nearly 6 months of the year, you’ll understand this. You start to get a little antsy, a little fidgety, and a little impatient when signs of spring start to appear. I’m alright with snow, especially in December. I can’t imagine a Christmas without [...]You just finished reading Gluten-free Baked Lemon Doughnuts! Consider leaving a comment!The post Gluten-free Baked Lemon Doughnuts appeared first on The Baking Beautie
The Baking Beauties - 03/07/2013 07:00 AM

Best Chicken Fried Rice
Once again, I got 4 different meals from one 5 lb. potted chicken. I got 5 cups of delicious chicken stock for future soups; chicken salad sandwiches for lunch; chicken quesadillas for another lunch; and tonight, Chinese Fried Rice from one poor unlucky bird. This is SO good, and SO easy. They say it's best to use leftover rice for fried rice, but I never seem to have it. So, I make a batch
Stacey Snacks - 03/07/2013 07:00 AM

To see all the latest headlines, click here 

More recipes
Raspberry Angel Cake
Chocolate cake recipes
Raspberry Angel Cake recipes
healthy cake recipes

Wednesday, August 22, 2012

Banana Cream Layer Cake

Banana Cream Layer Cake


Here we layer delicate banana-buttermilk cake with a fluffy Bavarian-style cream that’s made low-fat by combining nonfat milk with a reasonable amount of whipping cream. The rich taste makes it hard to believe that this cake has only 300 calories and 3 grams of saturated fat per slice.


More recipes

Raspberry Angel Cake

Chocolate cake recipes

Raspberry Angel Cake recipes

healthy cake recipes

Friday, August 17, 2012

New cake recipes


Chocolate cake recipes


Wednesday, August 15, 2012

Tuesday, August 7, 2012

Tuesday, July 31, 2012

Mom's Chocolate Gravy


Mom's Chocolate Gravy
By Redneck Epicurean
Source :food.com

When Mom and Pop got married, Pop had to call Mamaw to get this recipe.

When he was growing up, they were really poor (Papaw was a Baptist preacher and worked at various jobs.
Back then life was hard for a preacher with 4 kids).
This was one of their "desserts". Mom also made this when we were growing up and to this day, I still love a big hot heapin helpin.
One might ask how do you eat "chocolate gravy"? With homemade "cat-head" biscuits (Mamaw called them this because she made them "big as a cat's head") or canned country-style (Do not try this with one of those flaky-type canned biscuits - it just isn't the same.) and a chunk of butter about the size of the tip of your thumb. Let it kinda melt, then eat away. This is just like any other gravy, other than the addition of the butter at the table. I eat this with milk or coffee as the beverage, as nothing else tastes good. This is Redneck comfort food at its finest! **Times and yield are approximate. Please z-mail me with what you come up with.**

Ingredients:

Serves: 6

Yield: 1.5


1 cup granulated sugar or 1 cup Splenda sugar substitute

1 tablespoon butter

1 1/2 cups milk 2 tablespoons flour

3 tablespoons unsweetened cocoa powder (we prefer Hershey's)

Directions:

1 Mix all the dry ingredients in a heavy saucepan with a whisk. Using a whisk blends everything better than a spoon. Stir in the milk.

2 Cook over medium heat stirring constantly. Remove the pot when the mixture is thick like pudding.

3 Add the butter. Stir in until completely melted. Serve over biscuits with a teaspoon of butter dolloped on top.


Nutritional Facts for Mom's Chocolate Gravy Serving Size:
1 (102 g) Servings Per Recipe: 6

Amount Per Serving % Daily Value
Calories 200.6
Calories from Fat 40 20%
Total Fat 4.5 g 6%
Saturated Fat 2.8 g 14%
Cholesterol 13.6 mg 4%
Sodium 47.7 mg 1%
Total Carbohydrate 39.7 g 13%
Dietary Fiber 0.9 g 3%
Sugars 33.3 g 133%
Protein 2.8 g 5%

Read more at: http://www.food.com


More recipes

Raspberry Angel Cake


Chocolate cake recipes


healthy cake recipes

Tuesday, June 26, 2012

Jack-O'-Lantern


Jack-O'-Lantern
Epicurious | October 2008
by Matthew Mead
Cakes for Kids

yield: Makes one 6- x 7-inch cake; serves 12 to 16
Editor's note: This recipe is adapted with permission from Cakes for Kids, by Matthew Mead.
Bake this cake for a Halloween party and your guests will be trick-or-treating at your house for years to come. If you wish to serve this cake in a compote or other shallow bowl as we did, be sure to place it on a cardboard base first so you'll be able to set it in the compote without disturbing your work.
Skill Level: Medium
Ingredients
2 tablespoons shortening
2 tablespoons flour
1 recipe Chocolate Cake Batter
1 recipe Creamy White Frosting
Green gel or paste food color
Orange gel or paste food color
1 small waffle ice cream cone
4 ounces (1/2 cup) black fondant
Black decorating sugar, for sprinkling


Equipment:
Two 6-inch half-sphere cake pans (such as Wilton Sports Ball set) or two 1 1/2-quart
ovenproof bowls
Waxed or parchment paper
Toothpicks
Wire cooling racks
Glass measuring cup
Small offset spatula
Cake plate or 4-inch round cardboard base (optional)
Plastic straw
2 decorating bags, #70 leaf tip, and #5 round tip
Rolling pin
Small, sharp knife
Small plate
Compote or shallow bowl, for serving

Preparation

1. Preheat the oven to 350°F. Lightly grease the bottom of each cake pan, then line it with waxed paper or parchment paper and lightly grease and flour the bottom and sides. Divide the batter between the pans and bake the cakes until a toothpick inserted in the center comes out clean, 30 minutes. Cool the cakes completely in the pans on cooling racks and then turn them out onto the racks.
2. While the cakes are cooling, transfer 1 cup of the frosting to a glass measuring cup. Tint it green (see Decorating Tips). Tint the remaining frosting orange.
3. Using an offset spatula, spread a thin layer of the orange frosting over the flat surface of 1 cake. Invert the second cake on top of the first, joining the flat surfaces of both domes together. Transfer the assembled cake to the cardboard base, if using, or a cake plate. Cover the cake completely with the rest of the orange frosting.
4. To make rib indentations as shown in the photo, hold a plastic straw against the cake, curving it from bottom to top. Lift it off, reposition it, and press again. Repeat all around the cake. (Gently incise the ribs with a skewer if you don't have a straw.)
5. For the stem, invert the ice cream cone and, using a clean spatula, cover it with the green frosting; add more frosting at the top to give the stem a curved tip. Place the stem on the top of the cake.
6. Fit a decorating bag with a coupler and the leaf tip; add 1 cup of the green frosting to the bag. Referring to the photo, pipe several leaves around the base of the stem. Hold the bag at an angle next to the stem. Squeeze out some frosting, allowing it to fan into a wide base, then decrease the pressure and slowly pull the tip away, lifting slightly, to form a point.
7. Remove the leaf tip and replace with the round tip. Pipe tendrils around the stem and leaves. Place the tip where you want the tendril to begin. Using even pressure, squeeze out some frosting and move the tip to draw the tendril. Release the pressure and lift the tip when the tendril is the desired length.
8. Using a rolling pin, roll the fondant to 1/8 inch thick. Referring to the photo and using a small, sharp knife, cut out the features. For the eyes, cut 2 triangles about 1 1/2 inches wide at the base and 1 1/2 inches tall at the center. For the nose, cut another triangle a little smaller than the eyes. Cut the smile to be about 4 inches from tip to tip. You can draw a paper pattern first if you like.
9. Spread the black sugar on a small plate (large enough to hold the smile) using the back of the spoon. Press each cutout into the sugar and then invert the coated cutout onto the pumpkin to form the face, pressing it into the frosting. Transfer the cake to the serving dish if you have not already done so.
Decorating Tips:
•Choose your colors: The best food colorings to use are the gel and paste varieties; the liquid type comes in fewer colors and you need much more of it than of the gel or paste to achieve the same tint intensity. If you wish to mix a custom color, mix gel with gel, paste with paste, or liquid with liquid. Gel color comes in a bottle with a squeeze top; simply squeeze out drops of color. Paste color comes in a small jar; it is more concentrated than gel and you need less of it. Use a toothpick or the tip of an offset spatula to add a "drop" of paste color to your frosting.
• To tint frosting, add a few drops of color, mix thoroughly, and then add and mix in more color one drop at a time until the desired intensity is achieved.
• To fill a pastry bag with frosting or glaze, first fit a coupler and tip on the bag. Then fold down about 2 inches at the open end. Grasp the bag below the folded-down section (or support it in a small glass) and fill the bag half full with the frosting. Unfold the bag and twist the top, forcing the frosting down into the tip.
• You can use ready-made green candy leaves and green candy strings instead of tendrils if you don't wish to pipe the frosting.
• Instead of using fondant for the features, you can roll black gumdrops between sheets of waxed paper.


Source:epicurious

More recipes

Raspberry Angel Cake

Chocolate cake recipes

Raspberry Angel Cake recipes

healthy cake recipes

Thursday, May 31, 2012

Make Your Own Wedding Cake


Make Your Own Wedding Cake

Bake and decorate your own three-tiered creation with our videos, step-by-step instructions, and tips
By Lauren Salkeld
Getting started
I f you've decided to make a wedding cake recipes at home, congratulations on your bravery! Now, relax: We've got everything you'll need to create a masterpiece. We've enlisted Melissa Murphy, owner of the Sweet Melissa Patisseries in Brooklyn, New York, to help, and she's designed an elegant three-tiered cake decorated with delicate rosebuds and filled with luscious lemon curd and fresh raspberries. To help you reproduce it successfully, our do-it-yourself guide has multiple parts: Start with Murphy's recipes for baking the cake, then move on to our printable step-by-step assembly and decoration instructions. Or, if you prefer, skip right to Murphy's demonstrations in our videos.

Assembly

1. Setup

1 day ahead: Use Murphy's recipes to bake the cakes and assemble and frost each tier separately. (There will be one 12-inch, one 9-inch, and one 6-inch tier.) Chill the tiers for 24 hours to firm them up.

Either 1 day ahead or on the day of decorating: Make the third batch of buttercream and tint as follows: 2 1/2 cups pale-yellow for swag, 1 1/2 cups sage-green for leaves, 2 cups bright-yellow for roses, and 1 cup raspberry-pink for roses. This leaves 2 cups of white buttercream, which will be used to finish the seams on the cake.

2. Measure the tiers for even positioning

Starting with the 12-inch tier, measure 1 1/2 inches from the cake's edge and make a discreet but noticeable mark with a toothpick. Think of this as the 12 o'clock position and repeat at the 9 o'clock position. Measure and mark the 9-inch cake in the same way.

3. Mark the tiers for even positioning

Center an empty 9-inch cake pan over the 12-inch tier, lining it up with the toothpick marks, then gently press pan into the surface. Use an empty 6-inch cake pan to mark the 9-inch cake in the same way.

4. Insert dowels for support

Starting with the 12-inch tier, hold a dowel above the tier 3 inches from the edge and at the 12 o'clock position. Insert the dowel downward all the way into the tier and use a pen to mark where the cake meets the dowel. Carefully remove the dowel and cut 1/8 inch below the mark so that the dowel is just shorter than the height of the cake. Wipe the dowel clean and insert it back into the 12-inch tier. Repeat 3 more times, placing dowels in the 3 o'clock, 6 o'clock, and 9 o'clock positions, making sure to keep each dowel 3 inches from the edge. Repeat on the 9-inch tier, using only 3 dowels, positioning them 2 1/2 inches from the tier's edge, and placing them at the 12 o'clock, 4 o'clock, and 8 o'clock positions. Use buttercream to fill in any holes and smooth any surfaces.

5. Assemble the tiers

For best results, place your base or platter on a cake turntable. Spoon 1 tablespoon of buttercream onto the base and center the 12-inch tier on top. Spoon 1 tablespoon of buttercream onto the top center of both the 12-inch and 9-inch tiers. This will help glue the tiers together. Have an offset spatula ready nearby. Using both hands, hold the 9-inch tier, centered, 1 inch above the 12-inch tier. Carefully removing one hand, allow one edge of the 9-inch tier to gently drop and rest on the 12-inch tier. With the other hand, pick up the offset spatula, slip it under the 9-inch tier next to where you're holding it, and carefully remove your other hand. Using the spatula, slowly lower the tier, quickly sliding the spatula out from underneath at the last moment. Use the same method to place the 6-inch tier on the 9-inch tier.

6. Finish the seams

Fit a pastry bag with a #6 round tip and fill the bag with white buttercream. Pipe small dots along the seams between the cake tiers and along the seam where the bottom tier meets the base. Try to keep the dots uniform in size and shape, and pipe dots as close together as possible so there are no gaps.

Decoration
1. Mark the tops of the swags

Fit a pastry bag with a # 4 round tip and fill the bag with pale-yellow butter cream. Starting with the 6-inch tier, pipe a small dot on the top of the tier, right at the edge. Think of this as the 6 o'clock position, then rotate the cake a 1/4 turn and pipe a second dot at the top edge at the 3 o'clock position. Repeat at the 12 o'clock and 9 o'clock positions. Repeat on the 9-inch tier, centering the dots in between the dots on the 6-inch tier, then repeat on the 12-inch tier, placing the dots in between the dots on the 9-inch tier (and therefore aligned with the dots on the 6-inch tier). These dots are the tops of each swag, and indicate where the roses will be placed.

2. Pipe the swags

Position the pastry bag at the seam between the 6-inch and 9-inch tiers, directly above one of the dots for the tops of the swag on the 9-inch tier. Use the top part of your thumb to measure the distance up from the bottom of the 6-inch tier and pipe a dot there. This will be the bottommost point of one swag on the 6-inch tier — the tops of this swag will be the two dots at the top edge of the 6-inch tier on either side of this bottom dot. Create the swag by piping dots, spaced about 5/8 inch apart, in a gentle curving line connecting the bottom dot to both top dots. Repeat to create the remaining swags on each tier, being sure to first mark the bottom of each swag.

3. Pipe the leaves

Fit a pastry bag with a #352 leaf tip and fill the bag with sage-green buttercream. Hold the bag at the edge of the top of the 6-inch tier, at the top of one of the swags. Hold the bag so that it's at a 65-degree angle from vertical. Position the decorating tip so that the slit is parallel to the top of the tier and points toward 1 o'clock (if 12 o'clock is the center of the cake). Briefly apply gentle pressure and pull the bag diagonally away from the edge of the tier. Stop applying pressure, then pull away quickly in the same direction to create the tip of the leaf. The leaf should lie neither horizontal nor vertically but should straddle the edge of the tier between the top and sides. Repeat to make a second leaf, starting from the same middle point, but extending along the edge of the tier to the left. Repeat to make two leaves at the top of each swag. Chill the cake for 20 minutes before adding the roses.
4. Prepare the pastry bag to create two-toned roses

Fit a pastry bag with a #104 rose tip. Using a small spatula or knife, paint a narrow stripe of raspberry-pink buttercream on the inside of the bag, aligning it with the narrow end of the rose tip. Fill the rest of the bag with bright-yellow buttercream. Hold the pastry bag so that the color-striped edge faces up and the narrow part of the tip is at the top. The color stripe will not be perfect at first. Pipe some buttercream onto parchment until the desired color stripe is achieved.

5. Pipe the first part of one rose

Hold the bag at the top edge of the 6-inch tier, between two leaves. Position the bag so the narrow part of the tip is pointing upward and the bag is pointing toward 6 o'clock at a 45-degree angle from vertical. To create the central rose petal, pipe a small letter "c" by applying gentle pressure while moving the bag to the left, then toward you. Stop applying pressure, touch the bottom of the tip to the surface of the cake, then pull away. Wipe the tip clean before moving on to the next step.

6. Pipe the second and third petals

Hold the bag so that the narrow part of the tip is pointing upward and the bag is pointing toward 6 o'clock at a 45-degree angle from vertical. Position the tip just to the right of the central petal, tucked into the middle of the "c." Pipe a backward "c" that wraps around the bottom of the first "c" by applying gentle pressure while moving the bag to the right, then toward you. Stop applying pressure, touch the bottom of the tip to the surface of the cake, then pull away. Wipe the tip clean before piping the last petal.

To pipe the last petal, again hold the bag so that the narrow part of the tip is pointing upward and the bag is pointing toward 6 o'clock at a 45-degree angle from vertical. Position the tip just to the left of the central petal, in the middle of the first "c." Pipe another forward-facing "c" that wraps around the bottom half of the first by applying gentle pressure while moving the bag to the left, then toward you. Tuck the bottom of this "c" between the bottoms of the first 2 petals, then stop applying pressure, and pull away.
Tips for Making and Transporting Your Cake

Get organized

To keep things running smoothly, gather all necessary tools before you start. For the assembly, you'll need: a ruler, several toothpicks, a pen, empty 9-inch and 6-inch cake pans, an offset spatula, 2 wooden dowels (5/16 inch in diameter and about 48-inches in length; plus an extra dowel if you plan on moving your cake), sharp pruning sheers, and several damp cloths. For decorating, you'll need: a cake turntable, food-coloring gels, 4 decorating tips, a small offset spatula, and about 9 cups (1 batch) of buttercream.

Select a sturdy and attractive base

White cake bases can be purchased at cake decorating stores, or you can use a flat, round platter or tray. Alternatively, you can make a base yourself: Cut out a circle of plywood at least 13 inches in diameter or stack and glue together several rounds of cardboard. Cover the circle with white rolled fondant or wrap it in waxed paper. To "glue" the cake onto the base, spread about 1 tablespoon of buttercream on the base before positioning the first tier. You can also use royal icing as the "glue" — it becomes hard when dry, offering increased stability that can be helpful if you plan to move your cake.

For stability, keep the cake chilled

If you chill your cake thoroughly before beginning assembly and decoration, it should stay cool throughout the process. Just to be safe, though, it's best to keep it out of direct light and away from heat as much as possible. You'll know that the cake is becoming too warm if the buttercream starts to get soft. If this happens, return the cake to the fridge until the buttercream is firm, about 20 to 30 minutes. Another benefit to having a well-chilled cake? Piping mistakes can be easily removed with a small offset spatula.

Perfect piping

Before piping on the cake, it's a good idea to practice on parchment paper to get "warmed up." When you're ready to move on to the cake, start at the top, so you won't have to lean over something you've already piped, and rotate the cake turntable as needed to keep the section you're working on directly in front of you. As you're piping, inspect the decorating tip regularly and wipe away any buildup of icing, which could smudge your decorations.

Transport with confidence

If you plan on transporting your cake, adding an additional dowel that goes through all three tiers can help the layers stay together. Using a manual pencil sharpener, sharpen one end of a long (5/16 inch in diameter and about 48 inches in length) dowel to a very sharp point. Wipe the point clean, being sure to remove any splinters or wood shavings. After assembling all the tiers, center the dowel above the cake. Holding it completely straight, carefully drive the dowel downward through the center of the cake, gently turning to break through each cardboard layer, until it touches the base. Using a pen, mark the dowel where it is flush with the top of the cake, then carefully remove it. Cut the dowel about 1/8 inch below your mark, then wipe it off and carefully reinsert it into the cake, pushing it down until it pierces the base and anchors the cake. Use buttercream to fill in the hole at the top of the cake, then smooth the surface with an offset spatula.

Source Information

Cutting the dowels is easiest if you use very sharp pruning shears, preferably with "ratchet action." Both dowels and pruning shears can be purchased at hardware stores.
Pastry bags, decorating tips, food-coloring gels, cardboard rounds, cake bases, and cake turntables are available at cake-decorating and specialty shops or nycake.com.


Source and images:epicurious


More recipes

Raspberry Angel Cake

Chocolate cake recipes

Raspberry Angel Cake recipes

healthy cake recipes

Tuesday, May 15, 2012

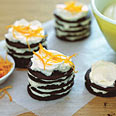
Chocolate-Orange Cookie Stacks


Chocolate-Orange Cookie Stacks
Bon Appétit | March 2007

yield: Makes 8 servings
These have a finished, pastry-shop look but require astoundingly little effort. The stacks need to chill at least six hours, so get started early in the day — or the night before


Ingredients:

1 cup chilled heavy whipping cream
2/3 cup frozen orange juice concentrate, partially thawed


40 chocolate wafer cookies (about one 9-ounce package)


Finely grated orange peel


Preparations:

Using electric mixer, beat cream and orange juice concentrate in medium bowl until stiff peaks form.

Place 8 cookies on rimmed baking sheet, spacing apart. Spoon about 1 level tablespoon whipped orange cream atop each cookie, then top each with second cookie and another tablespoon cream. Repeat 2 more times with cookies and cream, creating 8 stacks of 4 cookies with 4 layers of orange cream. Top each stack with fifth cookie. Transfer remaining orange cream to small bowl; cover and chill cream. Cover and chill stacks at least 6 hours or overnight (cookies will soften).

Carefully transfer 1 stack to each of 8 plates. Rewhisk reserved orange cream, if necessary, until stiff peaks form. Spoon dollop of orange cream atop each stack, sprinkle with grated orange peel, and serve.

Source:epicurious

More recipes

Raspberry Angel Cake

Dessert Recipes

Raspberry Angel Cake recipes

healthy cake recipes

Saturday, May 12, 2012

The Ever Famous Rolex Watch


The Ever Famous Rolex Watch

The Rolex watch is a very famous piece of jewelry and a staple in the timepiece genre. You must keep in mind that when attempting to sell my Rolex watch, or if you are a vendor in general and need to learn to sell Rolex, there are many thoughts necessary to seal the sale and obtain the resale value. Two of my personal favorite models of the Rolex company include the bamford model and the DLC Rolex. In general, you should obtain a good number of black Rolex watches since they are so popular and seem to constantly be a consumer favorite. They are designed perfectly and will match perfectly with any outfit of your choosing. For example, try the Rolex Mens Stainless Steel Daytona Black Dial. This black rolex watch is a favorite and is rated very high on consumers lists of favorite watches. Whether you are decked out in a suit or are in a casual polo tee on a Friday, this black rolex watch will constantly increase your style meter and will make you appear both professional and show your great tastes. The amount that you spend on obtaining this watch will be greatfully paid off with a steady flow of compliments from co-workers, friends and family alike. It has absolutely stunning features such as having what authorities are calling "one of the top ten best movements ever", the Calibre 4130. The Calibre 4130 uses less components than other models and is extremely durable. You could drop it as much as you like (although please don't do that), and the watch will still be in fantastic condition. Rolex watches are a wonderful and beautifully-crafted collectors item and are truly treasured by those who earn them. As men spend thousands of dollars on diamond rings for their wives, men should be able to spend just as much on a nice watch for himself as well. The value of these watches steadily increases over time, and so does the consumer want/desire for the watches. Even if you get put on an extensive waiting list, the wait is always worth it. But if you aren't patient, feel free to go out and find a seller who will help you get your new personal Rolex! Rolex is extremely popular amoung people of all ages and genders. Make sure that the Rolex watches you are selling are top notch!

Thursday, April 19, 2012

China Moon Salmon

China Moon Salmon

By: JADESTAR

"You'll love the intense flavor of Asian ingredients that infuses this oh-so-easy salmon dish. And, the salmon is prepared in a steamer so it's healthy too! Serve with steamed rice and stir-fried vegetables."

Prep Time:15 Min

Cook Time:12 Min

Ready In:27 Min

Original Recipe Yield 4 servings

Ingredients

1 teaspoon olive oil
1 dash sesame oil
2 cloves garlic, minced
1 tablespoon julienned fresh ginger
1 tablespoon Chinese black bean and garlic sauce
1 teaspoon red pepper flakes
1/2 cup chicken broth
4 (4 ounce) fillets salmon
salt and pepper to taste


Directions

Begin heating water in the bottom of steamer pot.
Heat olive oil and sesame oil in a saucepan over medium heat. Saute garlic and ginger for 1 minute. Stir in black bean sauce and red pepper flakes. Cook for 5 minutes. Remove from heat, and stir in chicken broth; set aside.
Rinse salmon, and pat dry. Season each side lightly with salt and pepper. Place in a small shallow pan. Spoon black bean mixture over salmon. Place in steamer pot over boiling water.
Steam for 10 to 12 minutes, or until salmon flakes easily with a fork.

Nutritional Information:

Amount Per Serving Calories: 235 | Total Fat: 14g | Cholesterol: 68mg


Source:allrecipes

More Recipes:
Healthy Breakfast Recipes
Healthy Chocolate Recipes
diet food recipes

Tuesday, April 17, 2012

Sugar Free Brownies


Sugar Free Brownies

By: JUDYDOTCOM

"These are just what a diabetic needs to fill a sweet tooth but no sugar is added!"

Prep Time:20 Min
Cook Time:25 Min
Ready In:45 Min
Original Recipe Yield 25 squares

Ingredients

1/2 cup margarine
1/4 cup unsweetened cocoa powder
2 eggs
1 cup granular sucrolose sweetener (such as Splenda®)
3/4 cup all-purpose flour
1/8 teaspoon salt
1/4 cup skim milk
1/2 cup chopped walnuts (optional)

1 (1.4 ounce) package sugar free, chocolate fudge flavored instant pudding
1 cup skim milk

Directions

Preheat oven to 350 degrees F (175 degrees C). Grease and flour an 8x8 inch pan.
In a small saucepan over medium heat, melt margarine and cocoa together, stirring occasionally until smooth. Remove from heat and set aside to cool. In a large bowl, beat eggs until frothy. Stir in the sucrolose sweetener. Combine the flour and salt; stir into the egg mixture then mix in the cocoa and margarine. Finally stir in the 1/4 cup of milk and if desired, the walnuts. Pour into the prepared pan.
Bake for 25 to 30 minutes in the preheated oven, until a toothpick inserted into the center, comes out clean. To make frosting, Mix together the sugar free chocolate pudding mix and 1 cup skim milk using an electric mixer. Mix for about two minutes or until thick. Spread over cooled brownies before cutting into squares.

Nutritional Information:

Amount Per Serving Calories: 78 | Total Fat: 5.7g | Cholesterol: 17mg

Source:allrecipes

More Recipes:
Healthy Breakfast Recipes
Healthy Chocolate Recipes
diet food recipes

Friday, April 13, 2012

Mini Pineapple Upside-Down Cakes


Mini Pineapple Upside-Down Cakes

By: Cindy Colley
"These individual pineapple upside-down cakes are an eye-catching addition to my holiday dessert table. A boxed cake mix recipe makes them easy to bake anytime."

Prep Time:20 Min
Cook Time:20 Min
Ready In:40 Min


Original Recipe Yield 24 servings

Ingredients

2/3 cup packed brown sugar
1/3 cup butter, melted
2 (20 ounce) cans sliced pineapple
1 (18.25 ounce) package yellow cake mix
3 eggs
1/3 cup vegetable oil
12 maraschino cherries, halved

Directions

In a small bowl, combine the brown sugar and butter; mix well. Spoon into 24 greased muffin cups. Drain pineapple, reserving the juice. Trim pineapple to fit the muffin cups; place one ring in each cup.
In a large mixing bowl, combine the cake mix, eggs, oils and 1-1/4 cups of the reserved pineapple juice; mix well. Spoon over pineapple, filling each cup two-thirds full. Bake at 350 degrees F for 20-25 minutes or until a toothpick comes out clean.
Immediately invert onto wire racks to cool. Place a cherry in the center of each pineapple ring.

Source:allrecipes
--------------------------------------------------------
More recipes

Raspberry Angel Cake

Chocolate cake recipes

Raspberry Angel Cake recipes

healthy cake recipes

Thursday, April 12, 2012

Maharani Cupcakes


Maharani Cupcakes

By: mkecupcakequeen
"Named for a queen in India, these coconut cupcakes with curry lemon curd and a sweet basil cream topping will wow your friends and family. They have sweet but exotic flavors and a stunning presentation. The cupcakes take time to create, but the final product is worth it! The lemon curd and basil cream need time to chill, so they can be made the night before."

Prep Time:30 Min
Cook Time:20 Min
Ready In:4 Hrs 30 Min


Original Recipe Yield 2 dozen cupcakes

Ingredients

Sweet Basil Cream:
1 1/2 cups heavy whipping cream
1 bunch fresh basil, washed and dried

Sweet Curry Lemon Curd:
1 cup white sugar
2 eggs, lightly beaten
2 tablespoons mild curry powder
3/4 cup fresh lemon juice
3 lemons, zested
1/4 cup unsalted butter, melted

Coconut Cupcakes:
1 (18.25 ounce) package white cake mix
1 cup sweetened flaked coconut
1 1/4 cups water
3 eggs
1/3 cup vegetable oil
2 tablespoons coconut extract

6 cups confectioners' sugar, divided
1/2 (8 ounce) package cream cheese, room temperature

1 tablespoon silver dragees decorating candy

Directions

To make the sweet basil cream, heat the whipping cream in a saucepan until hot; do not boil. Turn off the heat and add the basil, stems and all, to the cream and allow it to steep for 1 hour. Refrigerate the cream for 3 hours or overnight. Strain and discard the basil.
Meanwhile, make the sweet curry lemon curd. Use a large microwave-safe bowl: the curd will expand to twice its volume as it cooks. Whisk together the white sugar, two eggs, and curry powder until smooth. Stir in the lemon juice, lemon zest, and butter. Cook in the microwave, stirring at one-minute intervals, until the mixture is thick enough to coat the back of a metal spoon. Pour the cooked curd through a sieve and refrigerate for at least three hours or until set. The mixture will have the consistency of soft pudding.
Preheat an oven to 350 degrees F (175 degrees C). Line 24 muffin cups with cupcake liners.
Combine the white cake mix and coconut flakes in a mixing bowl. Stir in the water, three eggs, vegetable oil, and coconut extract. (For an extra-light texture, separate the egg whites from the yolks and beat the whites until medium-stiff peaks form. Fold the beaten egg whites into the cake batter.)
Scoop the cake batter into the prepared pans, filling the cups 2/3 full. Bake in the preheated oven until the edges are golden brown and a toothpick inserted into the center of a cupcake comes out clean, about 20 minutes. Cool completely.
In a chilled bowl, whip the cold basil-infused cream and 3 cups of confectioners' sugar until stiff peaks form. Refrigerate. Beat the cream cheese and remaining 3 cups of confectioners' sugar until smooth and soft. Fold in the whipped cream and mix gently until fully combined.
To decorate the cupcakes, spread a tablespoon of the lemon curd on top of each cupcake, followed by a dollop of the basil cream. Sprinkle with dragees.

Nutritional Information

Amount Per Serving Calories: 393 | Total Fat: 16.3g | Cholesterol: 69mg
Source:allrecipes
-----------------------------------------------------------------------
More recipes

Raspberry Angel Cake

Chocolate cake recipes

Raspberry Angel Cake recipes

healthy cake recipes

Wednesday, April 11, 2012

Easy Mexican Casserole


Easy Mexican Casserole

By: ANDREALF63

"This is an easy and very tasty dish. I often substitute ground turkey and low fat dairy products and it is still delicious! Serve with chips, salsa and green salad."

Prep Time:20 Min
Cook Time:30 Min
Ready In:50 Min
Original Recipe Yield 6 servings

Ingredients

1 pound lean ground beef
2 cups salsa
1 (16 ounce) can chili beans, drained
3 cups tortilla chips, crushed
2 cups sour cream
1 (2 ounce) can sliced black olives, drained
1/2 cup chopped green onion
1/2 cup chopped fresh tomato
2 cups shredded Cheddar cheese

Directions

Preheat oven to 350 degrees F (175 degrees C).
In a large skillet over medium-high heat, cook ground beef until no longer pink. Stir in salsa, reduce heat, and simmer 20 minutes, or until liquid is absorbed. Stir in beans, and heat through.
Spray a 9x13 baking dish with cooking spray. Spread crushed tortilla chips in dish, and then spoon beef mixture over chips. Spread sour cream over beef, and sprinkle olives, green onion, and tomato over the sour cream. Top with Cheddar cheese.
Bake in preheated oven for 30 minutes, or until hot and bubbly.

Nutritional Information :

Amount Per Serving Calories: 632 | Total Fat: 43.7g | Cholesterol: 119mg

Source:allrecipes

More recipes

Raspberry Angel Cake

Chocolate cake recipes

Raspberry Angel Cake recipes

healthy cake recipes

Thursday, April 5, 2012

smile pockets

Saturday, March 31, 2012

CINfully Delicious Chocolate Cupcakes


CINfully Delicious Chocolate Cupcakes

By: lovestohost Supporting Member

"My favorite flatmate gave me a recipe for snickerdoodle cupcakes which I transformed into these chocolate cinnamon delights since I'm not a big fan of snickerdoodles. Garnish with cinnamon sugar or cocoa and enjoy!"

Prep Time: 20 Min
Cook Time: 15 Min
Ready In: 1 Hr 5 Min

Original Recipe Yield 2 dozen cupcakes

Ingredients

1 (18.25 ounce) package chocolate cake mix
1 cup milk
3 eggs
1/2 cup butter, melted
1 teaspoon ground cinnamon
1 teaspoon vanilla extract
1 teaspoon cinnamon sugar, or as needed

1/2 cup butter
1/2 cup butter-flavored shortening
1 pinch sea salt
1 teaspoon vanilla extract
1 tablespoon ground cinnamon
1 tablespoon unsweetened cocoa powder
3 cups confectioners' sugar
1/4 cup milk
2 cups confectioners' sugar, or more as needed

Directions

Preheat an oven to 350 degrees F (175 degrees C).
Line 24 muffin cups with paper liners.
Beat together the chocolate cake mix, 1 cup milk, eggs, 1/2 cup melted butter, 1 teaspoon cinnamon, and 1 teaspoon vanilla extract in a bowl with an electric mixer on low speed until moist. Beat for 2 more minutes on medium speed.
Fill each muffin cup about 2/3 full of batter.
Sprinkle the cupcakes with cinnamon sugar.
Bake in the preheated oven until a toothpick inserted into the center comes out clean, about 15 minutes.
Cool in the pans for 10 minutes before removing to cool completely on a wire rack.
Cream together 1/2 cup butter and shortening in a bowl until smooth.
Stir in sea salt, 1 teaspoon vanilla extract, 1 tablespoon cinnamon, cocoa powder, and 3 cups confectioners' sugar.
Stir in milk.
Mix in 2 more cups confectioners' sugar or as needed until desired consistency is achieved.
Spread the frosting on the cooled cupcakes.

Nutritional Information:

Amount Per Serving Calories: 320 | Total Fat: 16.4g | Cholesterol: 48mg

Source:allrecipes

More recipes

Raspberry Angel Cake

Chocolate cake recipes

Raspberry Angel Cake recipes

healthy cake recipes

Easter Flower Cupcake

Chocolate cake recipes
Easter Flower Cupcake

Total Time:27 min

Prep15 min

Inactive12 min
Yield: 1 cupcake
Level: Easy

Ingredients

  • 1 vanilla cupcake, recipe follows
  • 2 to for 4 tablespoons White Fluff Frosting, recipe follows
  • Pink and yellow sanding sugar
  • 5 pink candied Jordan almonds
  • 1 red jujube
  • 1 piece green fruit-by-the-foot

Directions

Frost the cupcake. Top with pink sanding sugar. Place Jordan almonds on top in a flower petal pattern. Press a jujube candy in the center of the flower. Cut the fruit-by-the- foot to make the flower stem, press onto the cake.

Vanilla Cupcakes:

  • 2 2/3 cups sugar
  • 1 cup (2 sticks) unsalted butter, cut into 1-inch pieces
  • 2 large eggs
  • 2 large egg yolks
  • 2/3 cup milk
  • 2/3 cup water
  • 2 1/2 teaspoons pure vanilla extract
  • 2 2/3 cups all-purpose flour
  • 1 1/3 cups cake flour
  • 4 teaspoons baking powder
  • 1/2 teaspoon fine salt

Preheat oven to 350 degrees F. Line two 12-cup cupcake tins with paper liners. (To avoid cupcakes sticking if they overflow slightly, lightly spray the tops of the pans.) Put tins on a baking sheet. Set aside.

Process sugar and butter in a food processor until very creamy, scraping sides as needed, 1 to 2 minutes. Add the eggs and yolks, one at a time, pulsing after each addition. Add the milk, water, and vanilla and process to blend.

Whisk both flours, baking powder, and salt in a medium bowl. Add the dry ingredients, in 3 batches to the wet, pulsing, and then scraping batter off the sides of the processor as needed after each addition. Process until the batter is very smooth and pourable like pancake batter, about 2 minutes.

Evenly pour the batter into the prepared cups, filling them 3/4 of the way full. Bake until the cakes are just firm and spring back when gently pressed, and the tops are golden, 18 to 25 minutes. Cool slightly in tin, and turn out of tin when cool enough to handle. Cool cupcakes completely on a rack before frosting.

Yield: 24 cupcakes

Prep Time: 20 minutes

Cook Time: 25 minutes

Inactive Prep Time: 30 minutes

Ease of preparation: easy

Fluff Frosting:

  • 1/4 cup whole milk
  • 2 teaspoons pure vanilla extract
  • 10 tablespoons unsalted butter, softened
  • 5 cups confectioners' sugar
  • 1/2 cup marshmallow fluff
  • Pinch fine salt

Whisk the milk and vanilla extract together in a small bowl.

Slowly beat the butter and sugar, in another medium bowl, with an electric mixer until incorporated. Raise the speed to high and mix until light and fluffy, about 5 to 7 minutes. (Occasionally turn the mixer off, and scrape the sides of the bowl down with a rubber spatula.) Add the fluff and salt and reduce the speed to low. Add the milk and vanilla mixture, scrape the bowl down, and mix until fully incorporated. Raise the mixer to high and beat briefly until fluffy, about 1 to 2 minutes. Frost cupcake immediately.

Yield: 3 3/4 cups


Source:From Food Network Kitchens
------------------------------------------------------------------------------------------------
More recipes from our sites

Raspberry Angel Cake

Chocolate cake recipes

Raspberry Angel Cake recipes

healthy cake recipes

 
Disclaimer We respects the intellectual property of others. If you believe that your work has been copied in a way please Email us at reciperevenge@gmail.com . We remove your content in a timely manner once notified.